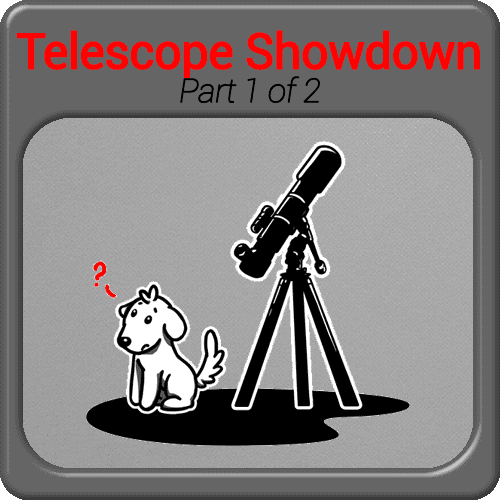
In our previous blog, we explored advantages and disadvantages common to various types of Telescopes. This second part we will explore refractors (both Achromatic and ED/APO) and reflector advantages and disadvantages and see what this all means for you. Along the way you will learn about chromatic aberration, coma, collimation and more.
A future article will explore the Schmidt and Maksutov designs. Let’s get an overview first up.
Telescope Strengths and Flaws Comparison
| Type of Telescope | Picture | Advantages | Disadvantages |
|---|---|---|---|
| Achromatic Refractor |  | Inexpensive, sharp views, solid design and durable. As a refractor, it offers contrast-rich images. | Chromatic aberration evident in f/5 to f/8 designs especially |
| ED/APO Refractor |  | Great for deep sky-imaging / Astrophotography, bypasses most aberration problems | Very high cost per cm of aperture. |
| Newtonian Reflector (e.g. Dobsonian) |  | Cheap. You can use a Dobsonian mount with it, which is just made of wood and is also inexpensive. | Due to the wide apertures, you may well get coma at f/5 and below especially. It's a given that you need to collimate this design now and then. |
| Schmidt-Newtonian |  | Lovely, wide field of view, Coma problems are reduced in this design. | There is a rather large secondary obstruction. Hard to get - they are all out of production. |
| Schmidt-Cassegrain |  | Compact, you can even attach a camera and do some imaging with it | There is a rather large secondary obstruction |
| Maksutov-Cassegrain |  | Compact, sharp optics, long focal lengths available. Particularly good for planetary viewing. | Slow focal ratios common, narrow fields make wide-views difficult or impossible. It has a very thick mirror which means long cooldown times. |
| Maksutov-Newtonian |  | Wide, flat fields with a sharp view and good contrasts. The central obstruction is smaller than the Mak-Cassegrain design | Heavy, especially at larger apertures and this also means long cooldown times. On top of that, they are hard to get and expensive. |
In this table, you can identify the various types of telescopes, and know what you expect from each. Let’s discuss these in turn.
Achromatic Refractor
The advantages, as seen on the table, are firstly that they are inexpensive. You can get one of these for very little – and it is a quality telescope when you buy one that has quality coatings. Sadly, poor, mass produced cheap versions of these are also often sold in inadequate diameters (60 or 70mm), on wobbly mounts, with dreadful eyepieces. However – when these are larger than 70mm, have good multi-coatings, sold with a solid mount and with some nice eyepieces, these are a delight – not least because of the very low entry point! As a refractor, these offer sharp, fantastic, contrasty views. As a general rule, a refractor offers a better image than a reflector of the same diameter. They are also fairly solid, don’t need collimating which means they are easy to “get into”. They are often called “Doublets” as they have two lenses. Another advantage of these is that they can be rapidly deployed and used. They air inside the telescope cools very quickly to the same temperature as the air on the outside and gives a great view quickly (when the temperatures are different, you can get a poor image – a doublet cools as quickly as just 20 minutes).
Let’s talk about the disadvantages. One flaw is chromatic aberration, which is evident in f/5 to f/8 designs especially. After f/8, it doesn’t really disturb the view very much at all. (This means that if you are getting a Achromatic Refractor, try and get one with a longer focal length, perhaps up to 1000mm). What’s chromatic aberration? Well, here is an example. A reminder that this picture is terrible. It was taken with a handheld wobbly iPhone to illustrate chromatic aberration – that is all.
| Wide View | Close Up |
|---|---|
 |  |
A reminder again that CA is most apparent when connecting cameras or digital devices to the telescope. You can look through the telescope visually, and it would be far less noticeable.
ED/APO Refractor
These have the same strengths as the Achromatic refractor, with the exception of price. In fact, they are expensive. Why? Well, for one thing, engineers found methods to get rid of the chromatic aberration you saw above. By adding an addition lens, the problem is largely removed. The problems? Well, for one thing, now that there is an extra lens, it is no longer a doublet, but a triplet. And a triplet is heavier (which now means you need a bigger mount), cools more slowly (some triplets can take two hours to cool) and is made of rare element glass which is expensive.
Do you recall what I wrote about CA not being too evident when you are using it for visual use? (which is what you will need to do when you are starting out – unless your rushing things) The advantages of an ED/APO are most evident when you are using it for photographic/astrophotography purposes. So – Great for deep sky-imaging / Astrophotography, bypasses most aberration problems – but also has disadvantages you need to be aware of. The most severe of which is – The very high cost per cm of aperture. If your saying “Oh, but it’s worth it!” I’d say, “just be sure!”. Money spent there is not spent on a decent mount perhaps – or an amazing eyepiece. Or three books to make your deep space experience amazing. That’s worth thinking about, wouldn’t you say?
Newtonian Reflector (e.g. Dobsonian)
There’s a lot to love about a Dobsonian. My first telescope was actually a refractor, but I couldn’t work it out. It was a Dobsonian that I later purchased that sunk me hard and deep into Astronomy. My one was a 10″ “backbreaker”.
Now, as I said, there is much to love about a Dob. Firstly, they are cheap considering the diameter of the mirror and the delicious views you can expect to see. You can get amazing views. The trouble is the size of the things. They are really long / high. So, where are you going to put it? Do you have stairs in your home? Then you will need to store it on ground level. Do you have a big drop to get outside? Then your going to need to carry it somehow. Do you want to go deep sky viewing in dark conditions but your backyard is full of light pollution? So, how are you going to get it to a dark site? Yes, of course – you’ll get it in the car, your confident – I’m confident too that your confident, but how many times do you think your really going to do it if it’s a pain? And you’ll decide it’s a pain after you get over this denial your experiencing right now. Having said that, if your on ground level, your viewing is right outside, you might be able to overcome that challenge by manufacturing some sort of trolley for it and have a wonderful time.
Now, while I am discussing Dobsonians, general reflectors also fit into this family, including the very common 114mm reflectors you see advertised everywhere secondhand. These are worth discussing. Are they are good as a Dobsonian style? Perhaps. But probably not. One of the reasons is that the Dobsonian comes on a swivel mount that is quite heavy. It provides a very solid mount for the telescope. The 114mm reflectors that you often see often come with poor mounts, terrible eyepieces and that will ruin your experience. For that reason, I recommend a Dobsonian style reflector over one of these reflectors.
You will know if a telescope you are looking at is a reflector or a refractor by looking at how you look into it. Do you look into the side of the tube? Then it is a reflector. Do you look into the end, perhaps by means of a “diagonal”? Then it is a refractor. One caution I want to point out. The mirrors on all reflectors are crucial to the whole thing. After a number of years, these do deteriorate and need replacing. When that happens, you are up for big costs. So, you need to very carefully check the mirror when you buy a reflector. I know I didn’t when I bought my first one – but I got lucky. You might not. The mirror is directly exposed to the sky and the elements and is subject to due and dust. That’s the first threat. The second is when the aluminium surfacing that is on the mirror starts degrading – there might be pits, scratches, or it might start flaking if your unlucky. If something (maybe an eyepiece, or flashlight) drops onto the mirror, it’s all over. Inspecting a reflector is important – if possible, view with it.
There’s something else to know about reflectors. They have not one, but two mirrors. The bottom one, which collects the light from the sky, and then the mirror it “focuses” that light onto – the top one, known as the “secondary mirror”. This one collects the light focused by the primary mirror and reflects it into your eyepiece – and then into your eye. Now, why bring this up? Well, you will need to make sure that the secondary mirror is pointed straight at the center of the big main mirror. If you don’t, it can result in fuzzy images. And once you have done that, you need to make sure the fat, big mirror at the bottom (“primary mirror”) is focusing the light directly at the secondary mirror. Once you have done that, you can repeat the process a few times to make sure everything is perfect. That is called “collimation” and you need to do it for every reflector out there. It’s something extra you will need to learn, it can be scary and nerve wracking at first, but then you will get used to it. You will probably need someone to show you, or you can watch a few youtube clips to get the idea.
Now, there’s another thing worth noting that’s quite annoying. You may well get coma at f/5 and below especially. Will that happen for you? Probably. Since your goal is going to be getting the most light collection possible, when you select a dob, you won’t want it to be 2 meters high, will you? That means that as it gets shorter and more portable, the f/ratio starts dropping. As it does, coma odds go up. They are evident at f/5, and as the aperture of the dob goes up, and the focal length goes down, coma will become a bigger and bigger factor. So, what is it?
Coma is where, while the center of your image will be sharp and in focus, as you move to the edges of your view, looking through your eyepiece, you will start to see trails / little tails on the end of the stars. And no matter how much you adjust the “focus” you won’t be able to get rid of it. Refractors don’t have it. Reflectors at low focal lengths simply do.
How bad is it? Truthfully, at f/5 you will notice it, but it won’t be that annoying. Some advice I got was “First improve your collimation technique – then get better eyepieces – last correct for coma”. I agree with that excellent advice. At f/4.5 or less you will certainly need to deal with it. How? With a expensive coma corrector. It will cost you about $200 to $300 (AU).
Thank you for joining me on this blog, I hope you enjoyed it. Please leave any comments below, I respond to each one.